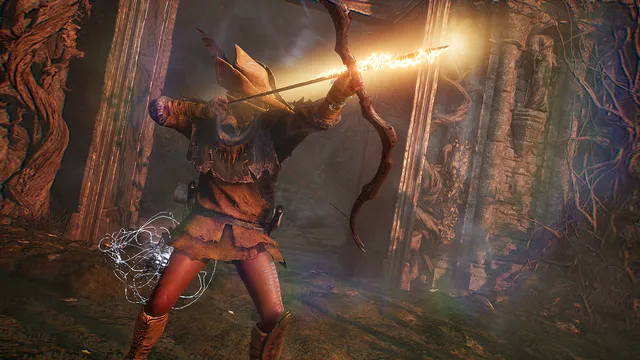
Masters of Fate
- Page first published
- 2024-06-30
- Page last updated
- 2024-07-02
- World
-
 Lords of the Fallen (2023)

Lords of the Fallen (2023) had a hurried release.
Hexworks didn’t abandon it at birth, though, and over the subsequent months, continuously fixed the bugs and balancing issues that marred its launch, and added a few new features to the game.
The Master of Fate update—or “Version 1.5” if you prefer a more boring nomenclature—was made freely available over six months after release, and consists of game modifiers you can enable upon starting (or restarting) a journey through Mournstead.
Looking at the available modifiers, it is obvious Hexworks took inspiration from the popular mods for Dark Souls and other games, and decided to give them a privileged first-party treatment.
 | Pre-upgraded loot — The only modifier that purely makes the game easier. No more collecting stones for the blacksmith, your drops come with an upgrade value commensurate with your character level. Combined to Randomized loot, this modifier could also be used to play the “Use What You See” challenge popular with Dark Souls Youtubers. |
 | Randomized loot — You’ll never know what you’ll find! The game implements failsafes to ensure only inconsequential loot is randomized, so there’s no risk of being softlocked out of key items. How difficult this modifier is depends on your build and goals, but i think as a whole, it makes things easier, as it spreads out endgame items all over Mournstead, instead of clustering the best stuff in higher level areas. |
 | Randomized enemies — They are only randomized to a limited extent. The algorithm seems to work by making groups of enemies who share the same characteristics, and for every area, replace every enemy type with another from that group. In effect, you rarely get ambused by an unexpected enemy creating a difficult situation. Much less challenging than Dark Souls mods that won’t hesitate to give you truly brutal substitutions. |
 | Increase enemy density — The game at release was characterized by a challenging enemy density. In addition to the many aggressive opponents waiting in the stages, Mournstead is full of human husks who will chance an attack if you get too close, but will not otherwise give enthusiastic chase. Once you cross over to the Umbral realm, it will feel like outrunning a zombie horde. Very likely, the developers intended for you to dodge the small fry, rather than fight them all. Nonetheless, they reined in the density a little in an update. This modifier merely restores the initial density, and thus, is not as difficult as you might hope. |
 | Withered healing — This is the scary one. This is the terrifying one. This is the one that keeps you a second away from failure at all times. Withered health is a complex mechanic that Lords of the Fallen (2023) explores in depth. Think Bloodborne’s rally mechanic, but without a time limit to earn your health back. When you defend from a hit, rather than take chip damage, part of your health bar withers, turning from red to gray: if you take an undefended hit, you lose it all; if you deal damage, you start to convert it back to real health. With this modifier on, every source of healing gives you back withered health. There is no way left to regain any health except by attacking something, or resting at a Vestige. |
 | Tremendous vestige decay — The game was initially designed to have very few vestiges, the game’s equivalent to bonfires, because your character has the ability to create temporary checkpoints in many places. Sadly, it was a daring idea Hexworks eventually reconsidered making the default. As a compromise, they added increasingly difficult versions of this modifier to New Game+ cycles. It’s only when you play without the fixed vestiges that the world design of Mournstead reveals its interconnected brilliance: you simply must try this modifier. You’re never too far from any location if you know how to unlock the shortcuts. |
 | Ironman — Permadeath. One mistake, you’re back at the start of the game. It’s not a full game over, as you get to keep your gear and your stats, but it remains a true challenge. After you master the moves of every boss, your true Ironman fear will be gravity. Still? As far as i fear, Ironman alone is less terrifying than withered healing. |
Starting a new character, Randomized loot and Randomized enemies might try your skills, but starting a new game cycle with an existing character, only Withered healing and Ironman are difficult enough you’d have to plan around them.
The Challenge

The rest of this article contains mechanical spoilers: name of late-game areas, of bosses, and of equipment.
To encourage you to explore the modifiers, the Master of Fate update added a variety of achievements for clearing the game with a specific combo of modifiers. For example, enabling Random Loot and Random Enemies would earn you the Come What May title.
Crucially, it is possible to earn all those trophies in a single run, by simply enabling every modifier at once.
I am no cheevo epic gamer, but upon learning about that, i knew i had to attempt such a run.
If i was to stack difficulty modifiers, i thought i should try to even the odds, and look into my options to face the challenge.

When joining online play, you can tell the modifiers in use by the host by looking above your vigor counter.
- There is no restriction on build or New Game+ cycle: that means i could bring a high level character with a completed build to the lowest difficulty level, instead of having to build a new one through successive deaths.
- There is no restriction on online play, and with the Ironman modifier active, it is possible to disable invasions to keep multiplayer cooperative only. Nonetheless, summoning another player is risky: they will probably not notice the modifier bar is lit up all over, will overconfidently rush in, and will promptly get you killed.
- Dying to the Lightreaper only stops an Ironman run if it happens during the last fight against him, at Calrath, giving you more chances to survive this difficult boss to complete the run, so it’s in your interest to kill him the first time you face him, as he won’t show up again if you defeat him early.
I took an existing character, with a build that was sufficiently strong to kill the last boss, and gave it a few tries, just to get a feel for the mechanics.
Soon, i had a good hunch what could make my planned run difficult, and devised a build.
The Plan
To get the most out of Princess’ Sting, you can’t budget the equip weight for pants.
- Stats
- 75 Agility
- 50 Endurance
- 50 Vitality
- Weapons
- Right hand: Jeffrey’s Dagger+10 with 3x Aelstrix runes
- Left hand: Jeffrey’s Dagger+10 with 3x Aelstrix runes
- Ranged: Assassin’s Bow+10 with Radiant Arrows.
- Accessories
- Pendant: Princess’ Sting
- Ring: Blackfeather Ranger Ring
- Ring: Blackfeather Ranger Ring
- Armor
- Light pieces, for Princess’ Sting
- Lamp
- Main: Umbral Eye of Lydia the Numb Witch
- Secondary: Umbral Eye of the Bloody Pilgrim
- Secondary: Umbral Eye of Rosamund
- Hotbar
- Sanguinarix (fully upgraded)
- Briostone Trio (always stay topped up)
- Burn Cure (too dangerous not to cure immediately)
- Ammunition Pouch (necessary to use when out of health)
- Vestige Moth (be trigger-happy, bail out of any situation that looks unpleasant)
The core of this archery build is the Umbral Eye of Lydia the Numb Witch: with this in your lamp, you no longer need ammunition to shoot your weapon, you can wither a portion of your health instead. It’s on-demand Bloodborne blood bullets!
Since this run already entails the Withered healing modifier, and thus, a lot of withered health management, it turns the main difficulty of the run into the core of the strategy.
The daggers are purely decorative, and not to be used: while they might do acceptable damage, they are just meant as a pair of stat sticks, meant to carry three Aelstrix runes each, providing a direct boost to archery damage, along with with the three accessories.

The core of the playstyle:
- Clear out most mobs, a little zombie slapping you unexpectedly can destroy a full withered health bar.
- If sent to Umbral unexpectedly, pop a Vestige Moth unless 100% sure you can recover the situation immediately.
- Never stay in Umbral a second more than necessary. Axiom is the second chance making the Ironman challenge manageable.
- When deliberately entering Umbral, already know what you are going to attack next to regain withered health immediately, and when you will be able to exit to Axiom.
- When in Umbral, use Vestige Seeds in flowerbeds if it will allow you to go back to Axiom sooner.
- Always keep withered health maxed out with Briostones.
- Always try to regain withered health ASAP by attacking something, but do not aggro without a plan.
The route to follow aims for the Radiant ending: the others endings entail backtracking that the Tremendous vestige decay modifier would make unnecessarily risky. The area progression i chose was as follows:
Skyrest Bridge ➡ Forsaken Fen ➡ Fitzroy’s Gorge ➡ Calrath ➡ Sunless Skein ➡ Cistern ➡ Calrath ➡ Skyrest Bridge ➡ Fief of the Chill Curse ➡ Skyrest Bridge (via teleportation) ➡ Manse of the Hallowed Brothers (entails some backtracking) ➡ Tower of Penance ➡ Abbey of the Hallowed Sisters ➡ Skyrest Bridge (via teleportation) ➡ Calrath (via shortcut) ➡ Bramis Castle
The Attempts
I gave my plan its first attempt. Upon restarting the game, you face the Lightreaper almost immediately, so i thought i should give summoning a try. A cooperator showed up, and left immediately after an easy victory.
Upon reaching Skyrest Bridge, i gave summoning another try, not sure whether they’re help or make things worse.
They picked the second option.
Rushing in, they’d aggro the entire place, making me deal with it. Even after entering Umbral, they remained reckless, and quickly got my character sent back to the start of the game.
Ah well. Human help is useful to kill bosses, but they make movement through the stages unpredictable. I was expecting to need a dozen attempts to nail the run, anyway.
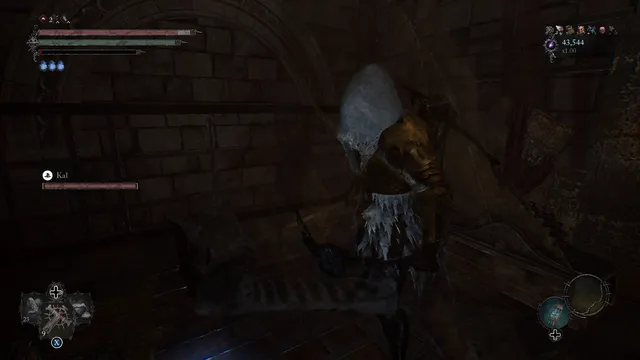
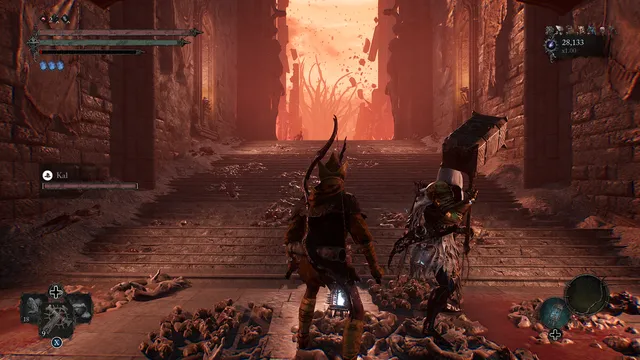
My silent ally, too shy to reveal their face to me.
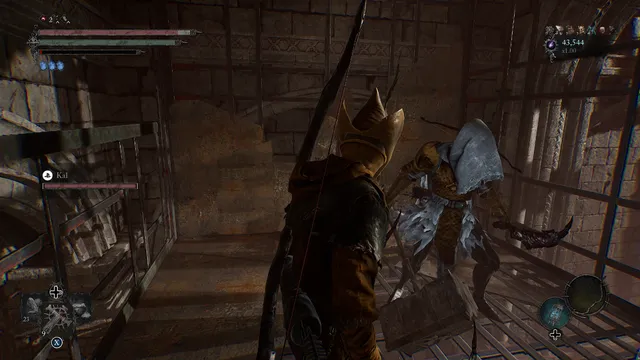
I gave my plan a second attempt. Likewise, i invited help for the Lightreaper. A Playstation player named Kal answered my summons, and we defeated the boss easily.
This time, the cooperator stayed after the boss, so i thought i could still give cooperation through the stages a second chance.
We rushed through the early game bosses, then reached Fitzroy’s Gorge, which marks the point it’s sensible to start slowing down a little.
In the second part of the stage, there is an Umbral bridge to cross, where a little flying asshole lies in ambush to divebomb you: knowing this passage is scary, i gestured for my ally to take point—at the cost of their life.
I felt bad for an instant, but could revive them for the low price of a Sanguinarix charge: the Ironman rule applies only to me, not to cooperators.
Even though the Master of Fate update had only been released a few days prior, i think my ally immediately understood they had joined an Ironman run. They’d avoid provoking strong enemies, stuck close to me, favored their weaker ranged attacks to fight, then rushed in with their large hammer to draw enemy attention off me.
As i didn’t know the details of their build, i would frequently use Vestige Seeds to create checkpoints and give them a refill, more frequently than if i were playing alone.
I was wondering when they would tire of a run that would grow more and more prudent over time, and trusted they’d take the Vestige Seed’s offer to leave once they had enough.
And… over an hour in, they were still here.
At this point of the run, the increasingly difficult stages made me commit a few mistakes, using a Vestige Moth to warp back to my last checkpoint. Later, i used those items unecessarily, in a panic over a situation that was not actually dangerous—a mistake my ally might not have understood, but humored.
And… two hours in, they were still here.
Reaching the Manse of the Hallowed Brothers, fatigue was starting to spur imprudent mistakes, but i thought i wanted to press on, if only to see whether my ally was truly determined to stay.
We reached the part of the run i was the most afraid of: the Tower of Penance. Forcing you into Umbral, the entire stage is based around platforming, with the game having terrible platforming controls.
To jump, you are required to sprint, and to sprint, you must press L3, that is, push in the analog stick: an unreliable maneuver with an horrifying failure rate.
Failing to L3 sprint is such a hazard, i would put down the game controller to jump with the mouse and keyboard, something i would normally never do.
My ally had to do the same jumps as i… and failed. Then failed again. Of course, as a summoned cooperator, it is not an issue for them to fail, but it certainly didn’t help my confidence to see that even such a skilled player would fail the platforming sections. One wrong jump, and i would be sent back to the start of the game.
Nevertheless, we survived, and once at the bottom of the tower, we knew the most difficult part of the ordeal was behind us.
We took it leisurely through Bramis Castle. We knew fatigue was putting us at risk of silly mistakes and overconfidence.
Three hours had elapsed, with almost no pause.
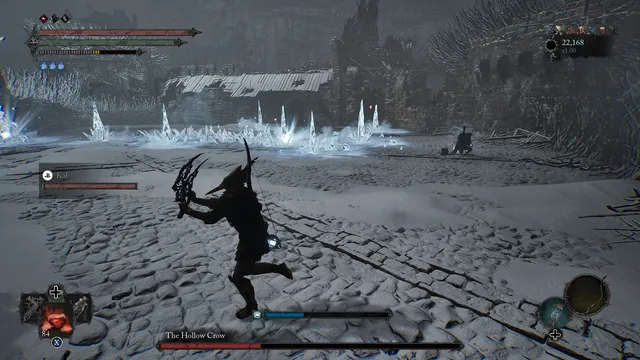
We exchanged many gestures, and we killed a god.